

Mummy deviled eggs are honestly the perfect Halloween appetizer when you want something that looks way more complicated than it actually is. Look, I’m gonna be honest here—I’m not the most creative person when it comes to party planning, but these little guys make me look like I actually know what I’m doing.
So here’s the thing about mummy deviled eggs… I discovered them completely by accident last Halloween when I was scrambling (pun intended) to make something for my neighbor’s party. Had exactly two hours, zero Pinterest-worthy skills, and a dozen hard-boiled eggs that were about to go bad. Sometimes desperation leads to the best discoveries, right?
Now, I’ve made regular deviled eggs probably a hundred times—they’re my go-to for literally every gathering because they’re cheap and people actually eat them. But mummy deviled eggs? Game changer. Same delicious filling, but wrapped up like tiny Egyptian pharaohs that somehow make everyone think you’re this amazing cook. The secret is really just in the presentation, and I’m about to tell you exactly how to nail it.
My Mummy Deviled Eggs Disaster (And How You Can Avoid It)
First attempt at mummy deviled eggs was… well, let’s call it a learning experience. Picture this: me at 10 PM the night before the party, trying to pipe mayo “bandages” with a sandwich bag that I’d cut the corner off of. Disaster. Complete disaster. The mayo was too thin, the cuts were too big, and my “mummies” looked more like eggs that had been attacked by a very drunk spider.
But here’s what I figured out after three tries and way too much cursing in my kitchen—the key to perfect mummy deviled eggs is all in the consistency of your filling and having the right tools. Or at least, better tools than a butchered Ziploc bag.
My 8-year-old refuses to eat anything that looks “weird” (his words, not mine), but somehow these mummy deviled eggs passed his test. I think it’s because they still taste like regular deviled eggs, just dressed up for Halloween. And honestly, that’s exactly what we need sometimes—familiar flavors with a fun twist.
What You’ll Need for Mummy Deviled Eggs (The Real Talk Version)
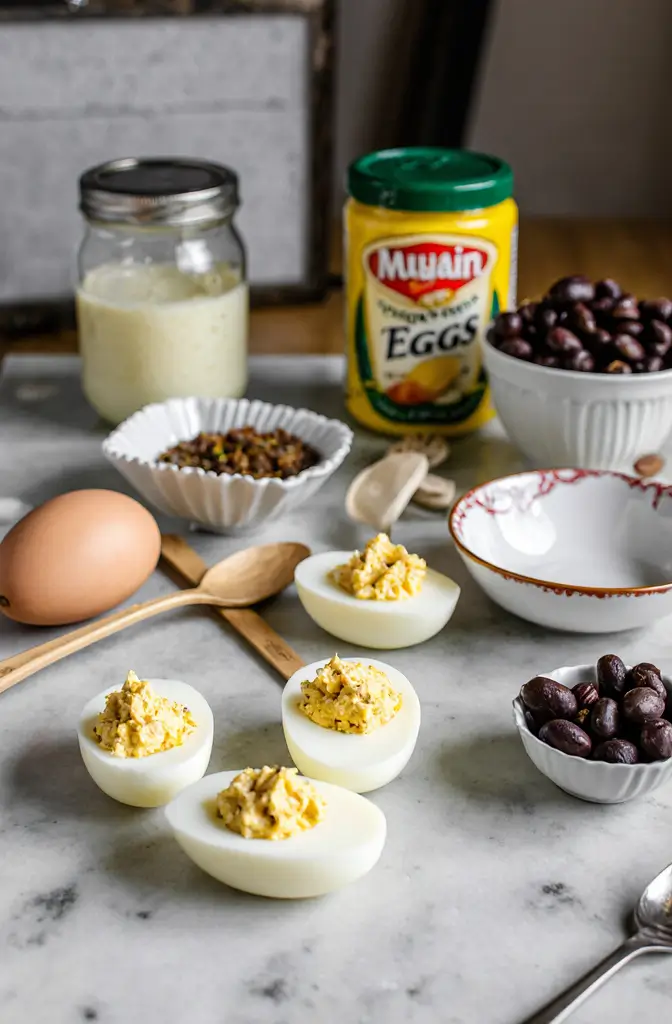
For the Eggs:
- 12 large eggs (buy 15 just in case you mess up a few—trust me on this)
- Water for boiling (obviously, but I’m being thorough here)
For the Mummy Filling:
- 6 egg yolks (from the eggs you just boiled)
- 1/3 cup mayonnaise (I always use Hellmann’s, don’t @ me)
- 1 teaspoon yellow mustard
- 1/2 teaspoon white vinegar
- Salt and pepper to taste
- A tiny pinch of paprika (optional, but it adds something)
For the Mummy Wrappings:
- 1/2 cup mayonnaise (separate from the filling mayo)
- 24 small black olive pieces (for the eyes—more on this later)
You’re probably thinking “wait, mayo in the filling AND for the bandages?” Yeah, I know it sounds like mayo overkill, but it works. The filling mayo gets mixed with other stuff and tastes like regular deviled eggs. The wrapping mayo stays pure and white and pipes beautifully for those mummy bandages.
The Step-by-Step (With My Real Kitchen Commentary)
Step 1: Boiling the Perfect Eggs for Mummy Deviled Eggs
Put eggs in a large pot and cover with cold water by about an inch. Bring to a rolling boil, then immediately remove from heat and cover. Let sit for 12 minutes exactly. I learned this timing the hard way after years of rubbery egg whites and green-tinged yolks.
While they’re sitting, prepare an ice bath. And by ice bath, I mean fill a big bowl with cold water and dump whatever ice you have in there. Don’t skip this step—it stops the cooking process and makes peeling so much easier.
After 12 minutes, transfer eggs to the ice bath. Let them hang out there for at least 5 minutes. This is when I usually clean up the kitchen because I’m weirdly motivated when I have a timer running.
Step 2: The Assembly Line Approach to Mummy Deviled Eggs
Peel the eggs under cool running water. The shells should slip right off if you did the ice bath thing correctly. If they don’t… well, sometimes eggs are just jerks. Work with what you’ve got.
Cut each egg in half lengthwise. Here’s where I always mess up—I try to go too fast and end up with wonky cuts. Take your time. Nobody’s judging your egg-cutting skills, but crooked mummy deviled eggs are harder to fill and they tip over.
Carefully remove the yolks and put them in a medium bowl. Arrange your egg white halves on a serving platter. I use a regular dinner plate because I don’t own fancy serving dishes, and honestly, nobody cares once these mummy deviled eggs are assembled.
Step 3: The Filling (This Is Where the Magic Happens)
Mash those egg yolks with a fork until they’re completely smooth. Add the 1/3 cup mayo, mustard, vinegar, and seasonings. Mix until it’s creamy and pipeable.
Taste it. This is important. Your mummy deviled eggs are only as good as the filling inside, so make sure it’s seasoned well. I usually add more salt than I think I need because eggs can be bland.
If your mixture seems too thick, add mayo one teaspoon at a time. Too thin? Add more mashed yolk if you have extra, or just accept that life isn’t perfect and move on.
Step 4: Filling Your Mummy Deviled Eggs
Spoon or pipe the filling back into the egg white halves. I use a regular spoon because I’m not fancy, but if you have a piping bag, go for it. Just don’t overfill them—learned this lesson when half my filling ended up on the plate instead of in the eggs.
Make sure the filling is mounded nicely. These mummy deviled eggs need some height to look good with their bandages, so don’t be shy with the filling.
Step 5: Creating the Mummy Bandages (The Fun Part)
Put the remaining 1/2 cup mayo in a piping bag or—if you’re like me—a sandwich bag with a very small corner cut off. And I mean VERY small. Start smaller than you think you need; you can always make it bigger.
Now here’s the trick for mummy deviled eggs that look authentic: don’t make perfect lines. Real mummy bandages would be messy, uneven, and wrapped randomly. Start piping mayo in horizontal lines across each egg, leaving gaps for the “eyes.” Overlap some lines, make some thicker than others, let some trail off the edges.
I like to do 3-4 bandage lines per egg, but honestly, just go with what looks good to you. These mummy deviled eggs should look slightly haphazard—that’s what makes them charming.
Step 6: The Eyes Have It
Cut your black olives into small pieces. I usually get about 4 eye pieces from one olive, depending on the size. Place two pieces on each mummy deviled egg where you left gaps in the mayo bandages.
The eyes don’t have to be perfect circles or exactly the same size. Actually, slightly mismatched eyes make your mummy deviled eggs look more character-filled and less artificial.
My Random Tips for Perfect Mummy Deviled Eggs
The Mayo Consistency Thing: If your piping mayo is too thick, it won’t come out smoothly. Too thin, and your bandages will be sad and droopy. Room temperature mayo works best, but if you forgot to take it out of the fridge (story of my life), just microwave it for like 5 seconds.
Olive Alternatives: Don’t like black olives? Me neither, actually. I’ve used tiny pieces of black pepper, capers (fancy!), or even just dotted on some soy sauce with a toothpick. Your mummy deviled eggs, your rules.
Make-Ahead Magic: You can prep these mummy deviled eggs a day ahead, but add the mayo bandages and eyes right before serving. The bandages tend to get a little weird-looking if they sit too long.
Storage Reality Check: Cover these loosely with plastic wrap and keep them cold. They’ll keep for about 3 days, but honestly, they never last that long in my house.
When Mummy Deviled Eggs Go Wrong (And How to Fix It)
Sometimes the mayo bandages crack or slide off. Happens to the best of us. Just scrape it off and start over—the eggs won’t care, and neither will your guests.
If your filling turns out too salty (been there), make another batch of yolks without salt and mix them in. If it’s too bland, add more mustard or vinegar rather than just salt—it brightens the whole flavor.
Oh, and if you completely mess up the piping like I did that first time? Just call them “zombie eggs” instead. Crisis averted.
The Real Talk About Mummy Deviled Eggs
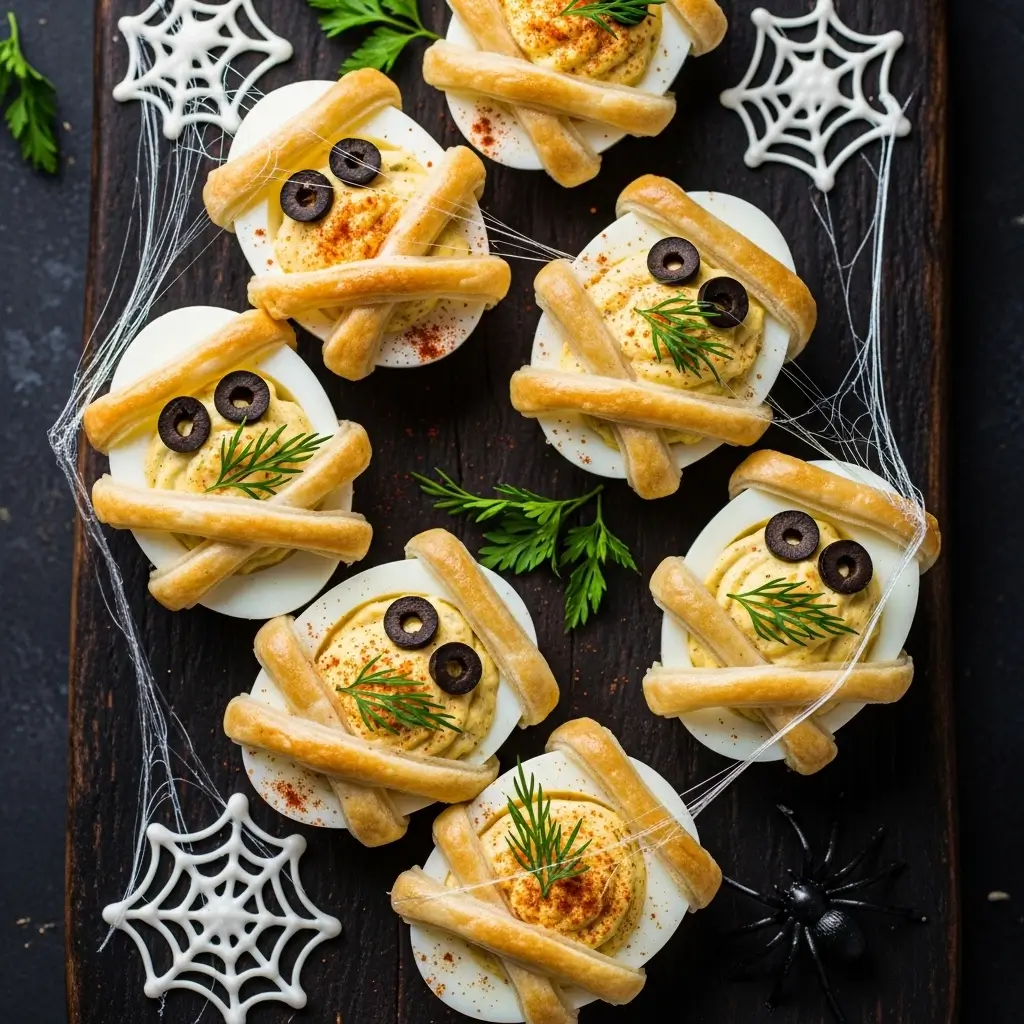
Look, these aren’t going to win any photography contests, and that’s perfectly fine. They’re supposed to be fun Halloween food, not museum pieces. Every time I make mummy deviled eggs, they look slightly different, and every time, people love them.
Kids think they’re hilarious, adults appreciate that they still taste like regular deviled eggs, and I get to feel like I’m actually good at this whole entertaining thing. Win-win-win.
The best part about mummy deviled eggs? They’re conversation starters. People always want to know how you made them, and you get to sound all creative and crafty even though you literally just piped mayo onto eggs.
Serving Your Mummy Deviled Eggs
These work great as part of a Halloween spread alongside other themed foods, or honestly, just as regular party appetizers that happen to look festive. I’ve served mummy deviled eggs at non-Halloween parties too because they’re just fun.
They’re best served cold, so keep them in the fridge until right before your guests arrive. And maybe make a few extra—people always eat more deviled eggs than you think they will.
Anyway, that’s my whole mummy deviled eggs story. From complete disaster to party favorite in the span of three attempts. If I can figure this out while slightly panicked at 10 PM, anyone can make these work.
Seriously, try making these mummy deviled eggs and let me know how yours turn out! And if you come up with any creative variations, I’d love to hear about them. Now I’m craving deviled eggs and it’s not even close to Halloween. Thanks a lot, brain.
Happy cooking! (And may your mayo piping skills be better than mine on attempt #1) 🎃
check more halloween appetizers for your inspiration !
Mummy Deviled Eggs
Spooky and delicious mummy deviled eggs perfect for Halloween parties. Classic deviled egg filling wrapped in mayo 'bandages' with olive eyes. Easy to make and impressive to serve!
Ingredients
- 12 large eggs
- 6 egg yolks
- 1/3 cup mayonnaise (for filling)
- 1/2 cup mayonnaise (for bandages)
- 1 teaspoon yellow mustard
- 1/2 teaspoon white vinegar
- Salt and pepper to taste
- Pinch of paprika (optional)
- 24 small black olive pieces (for eyes)
Instructions
-
Step 1Place eggs in large pot and cover with cold water by 1 inch. Bring to rolling boil, remove from heat, cover and let sit 12 minutes.
-
Step 2Transfer eggs to ice bath for 5 minutes to stop cooking process.
-
Step 3Peel eggs under cool running water and cut in half lengthwise.
-
Step 4Remove yolks and place in bowl. Arrange egg white halves on serving platter.
-
Step 5Mash yolks with 1/3 cup mayo, mustard, vinegar, salt and pepper until smooth and creamy.
-
Step 6Spoon or pipe filling back into egg white halves, mounding slightly.
-
Step 7Put remaining 1/2 cup mayo in piping bag and pipe horizontal lines across eggs for bandages, leaving gaps for eyes.
-
Step 8Cut black olives into small pieces and place two pieces in gaps on each egg for mummy eyes.